# Login and Upload
# Step1: Login
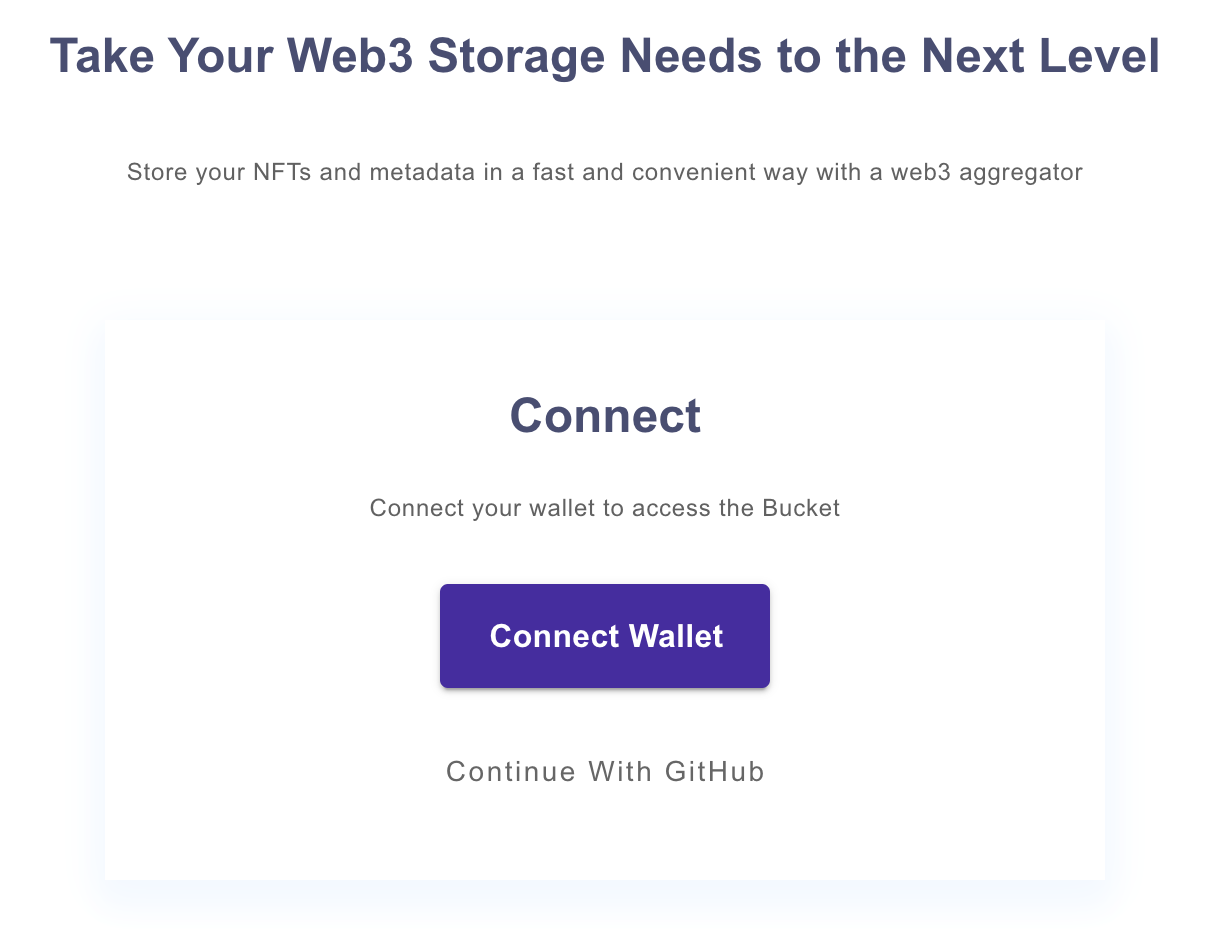
You can login to bucket via two ways, connect wallet or Github. If you register after February 15th, you will only be able to login using the wallet.
# Step2: Create Bucket
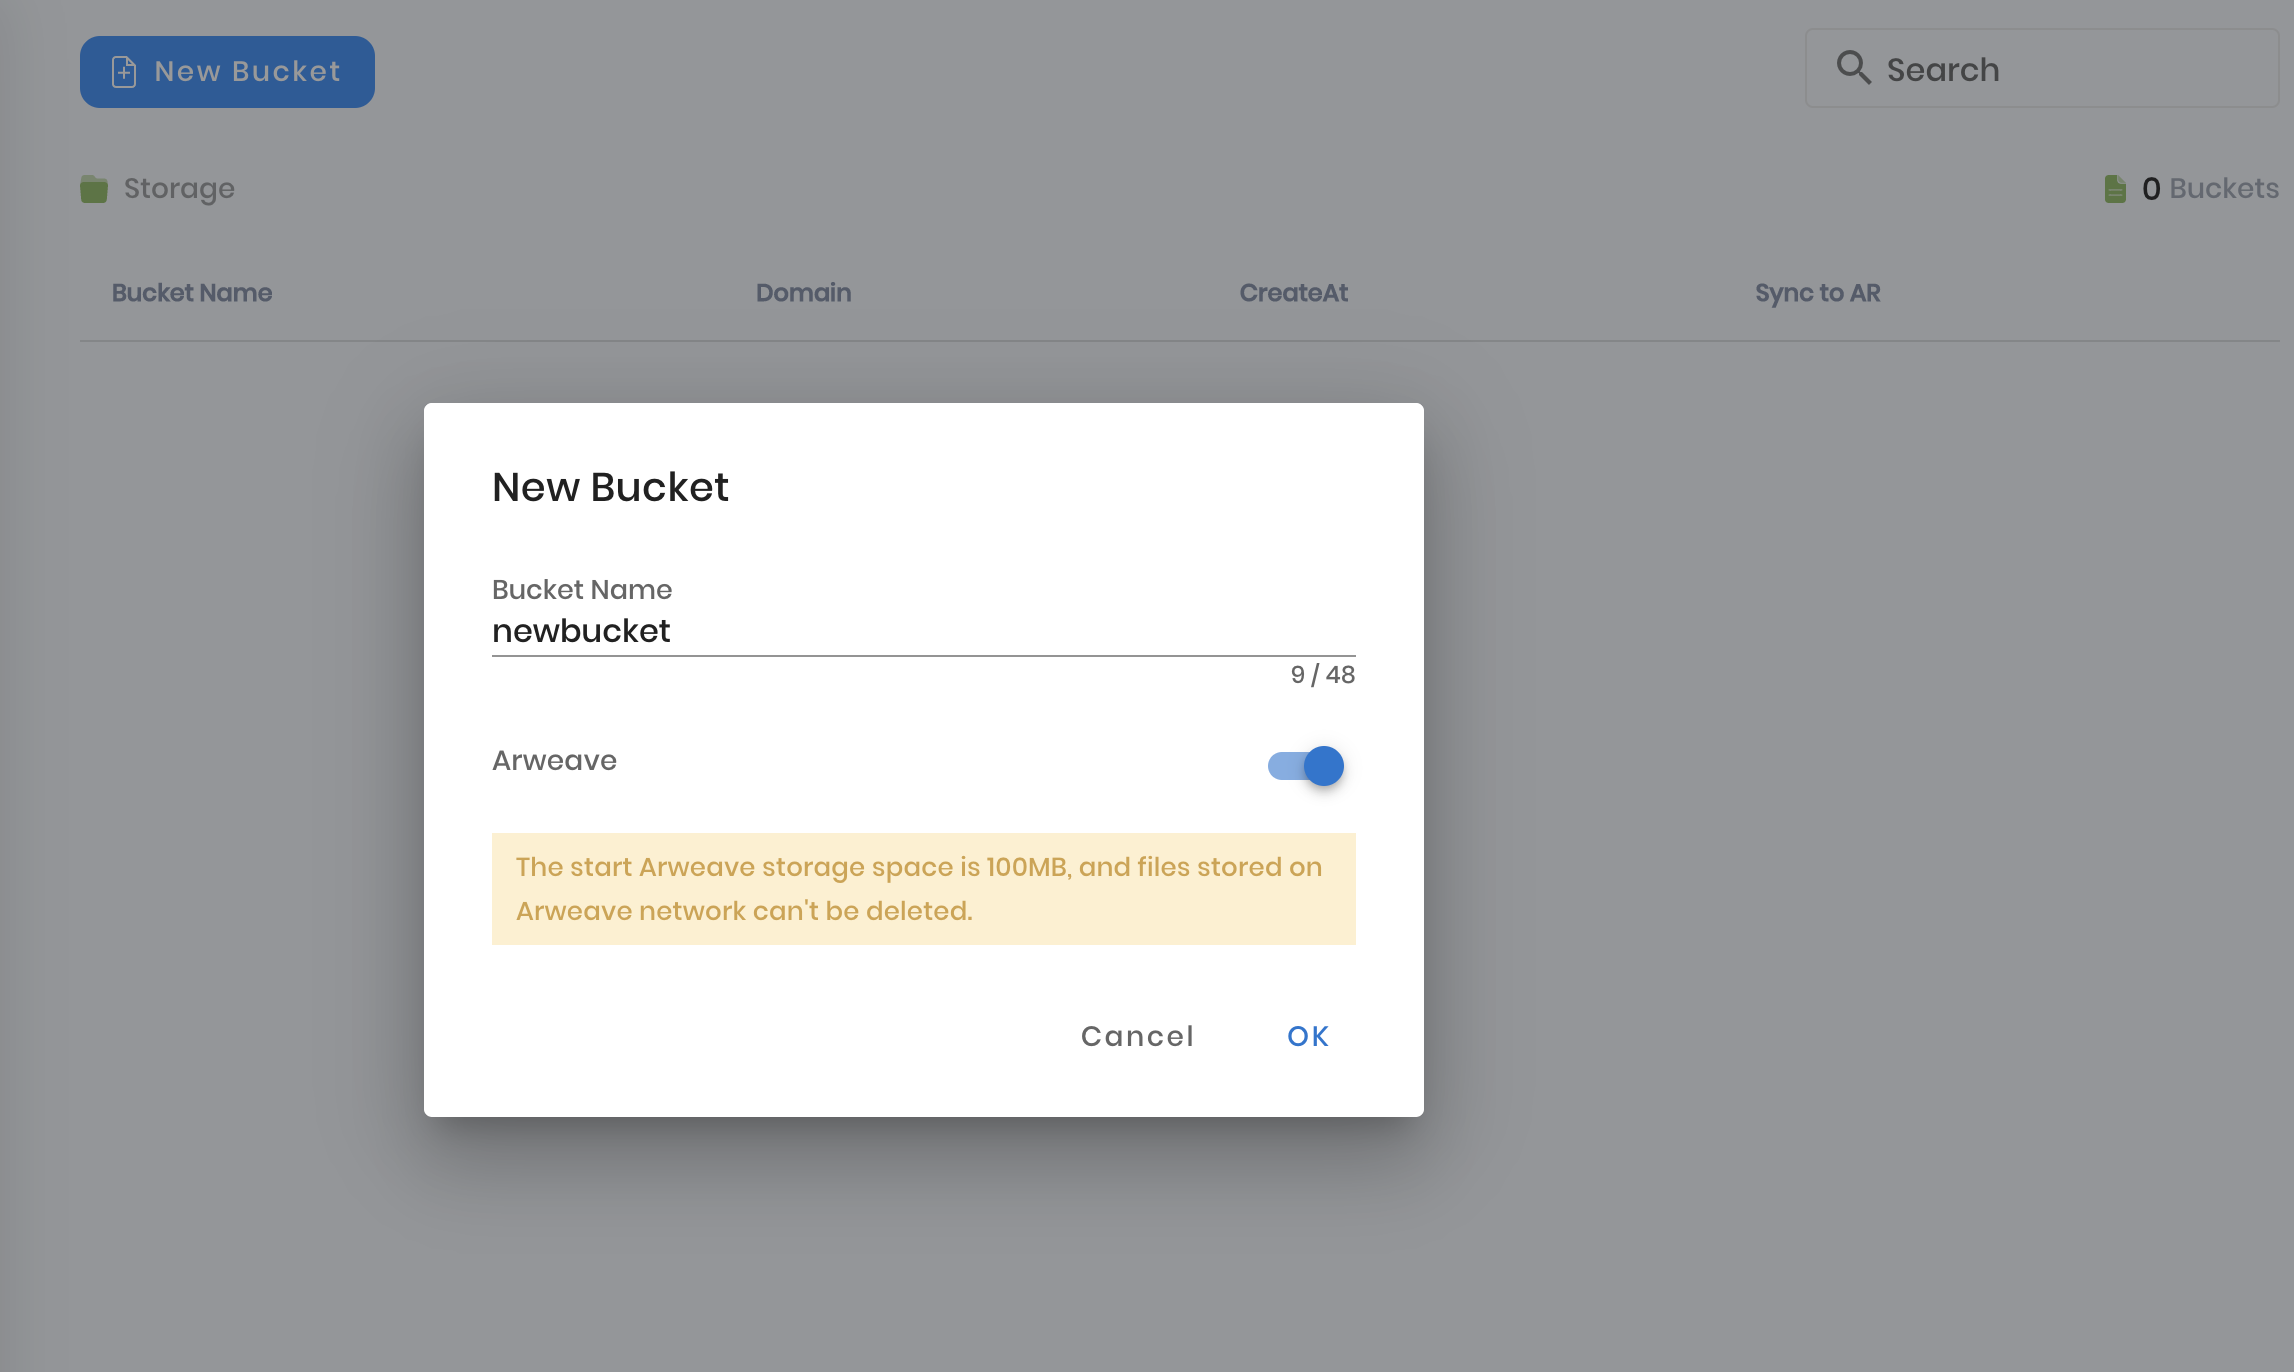
Click on the 'New Bucket' button in the top left corner, enter a bucket name to create your bucket. The system will give the domain name to your website automatically. Additionally, when creating a bucket, you can choose whether to use the Arweave function, and the files in the bucket will be automatically synchronized to the AR network when the switch is turned on.
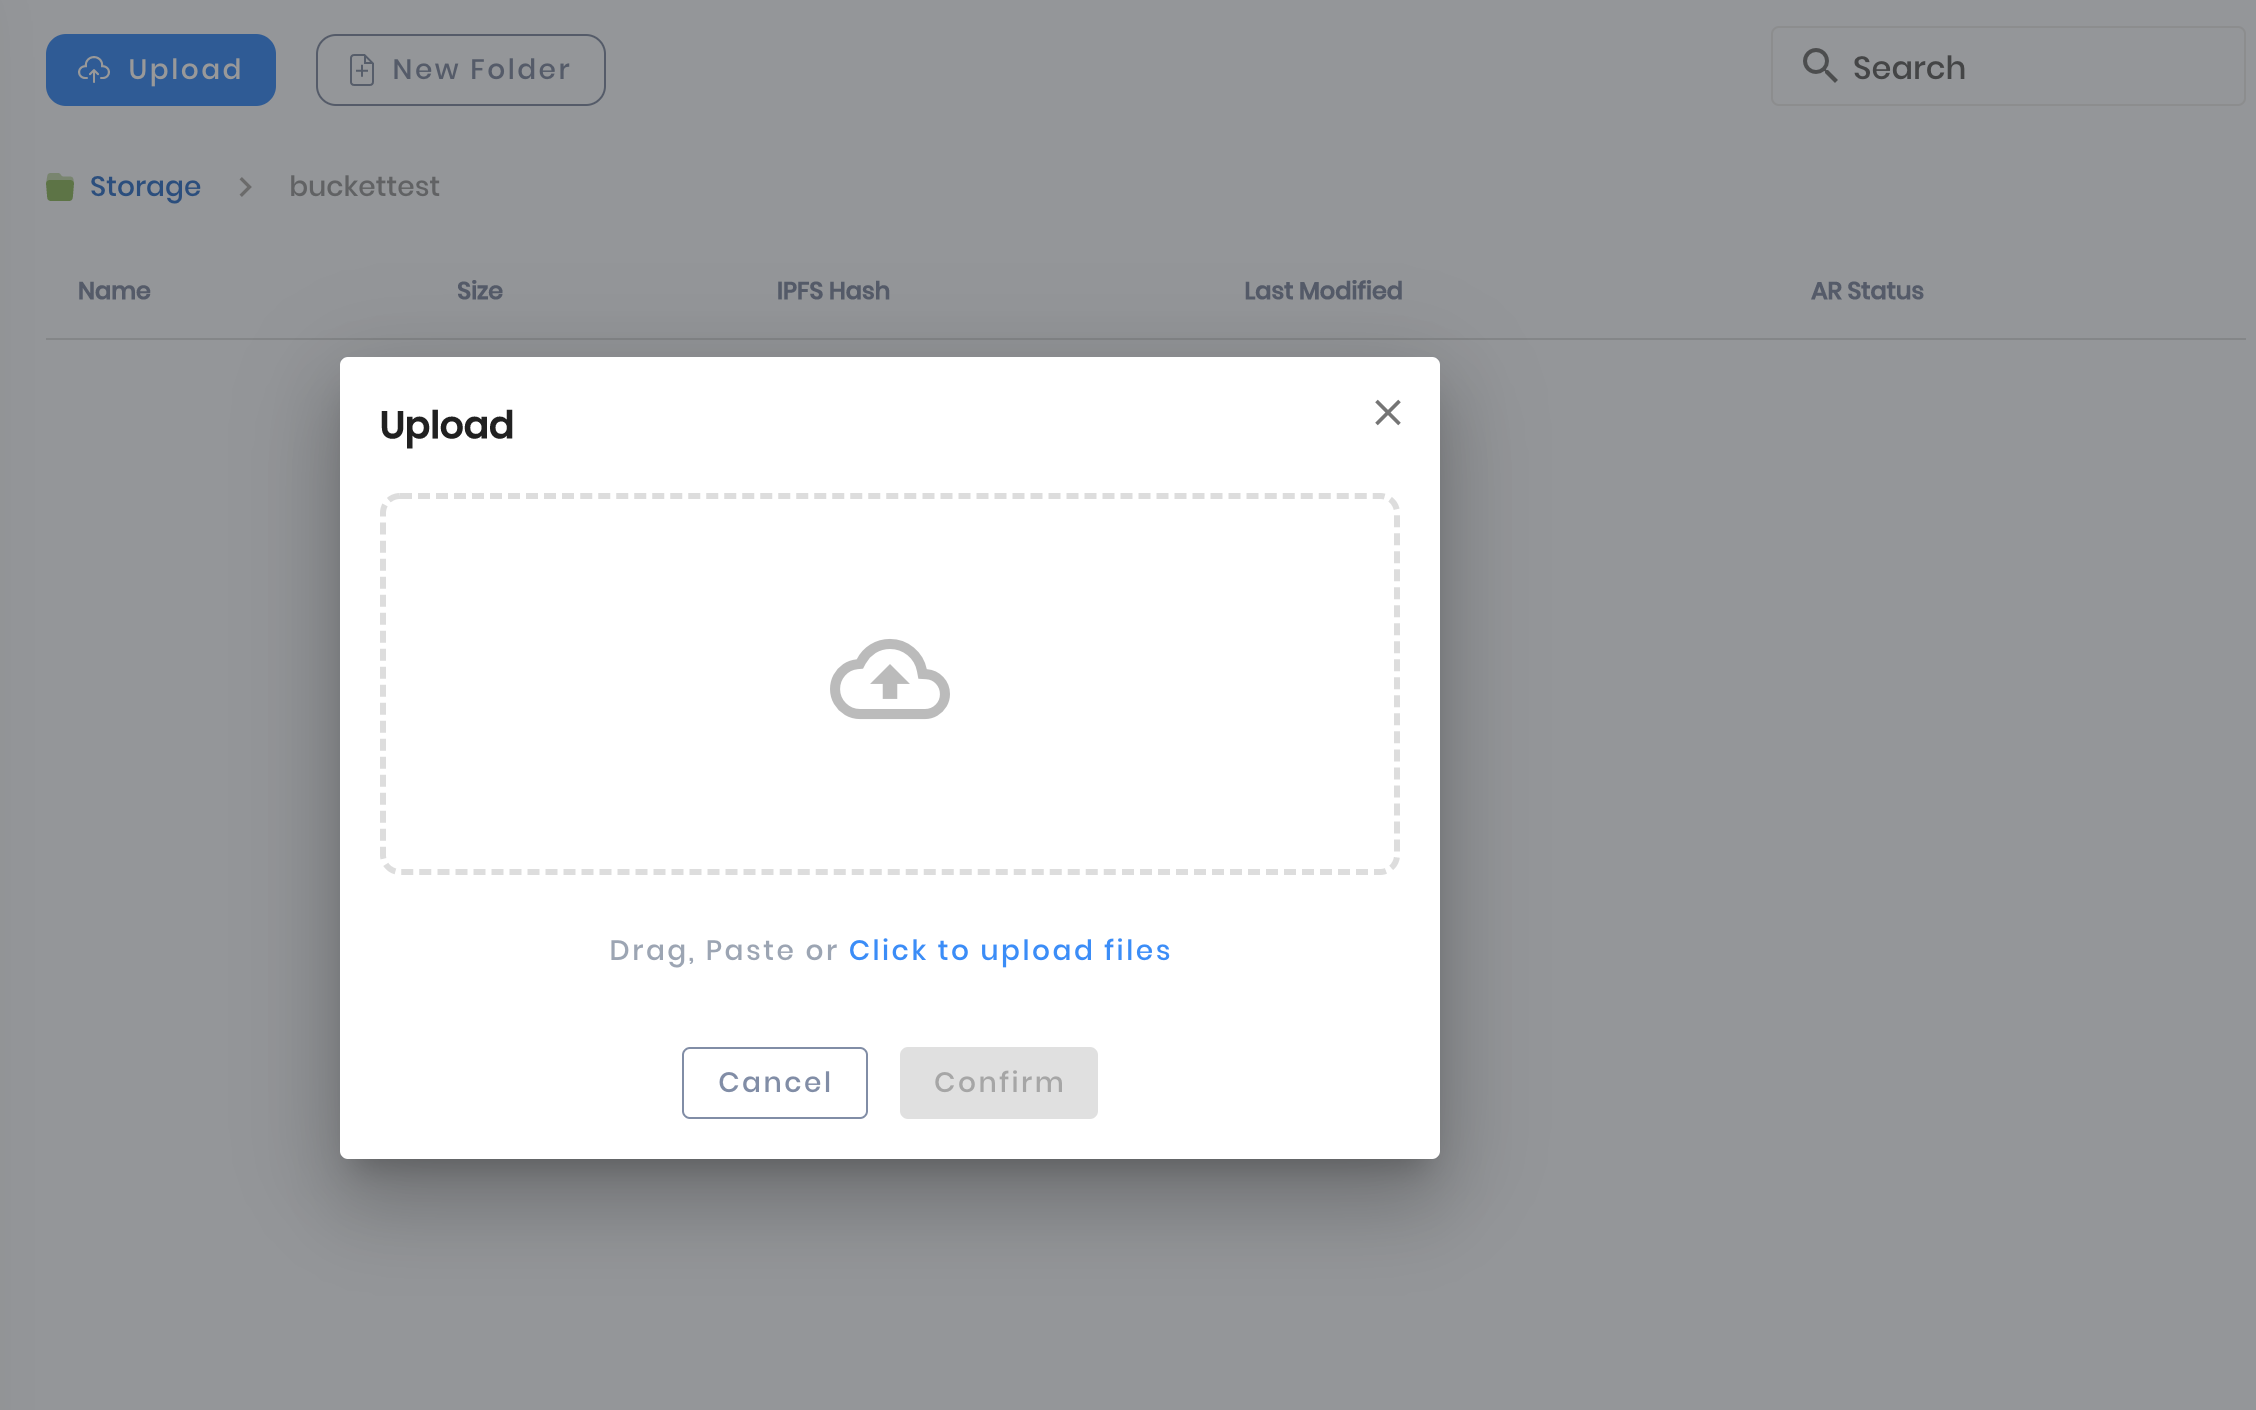
# Step3: Upload Files
After this select the bucket you just created, then click on the 'upload' button which will open the upload pop-up window. You can browse folders and files directly from your Finder or drag and drop them into the pop-up window.